Best Phone Accessories for Stargazing and Night Sky Photography: A Spec-Driven Guide
Disclosure: This post may contain affiliate links. We may earn a commission on qualifying purchases at no extra cost to you.
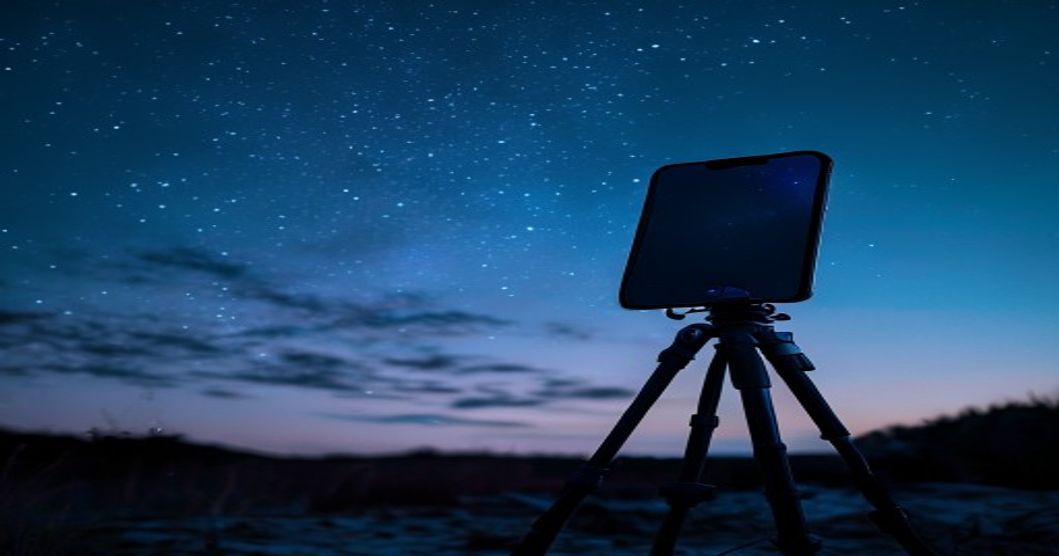
Here’s a myth that kills night sky photos before you even leave your driveway: “My phone has night mode, so I don’t need a tripod.” Wrong. Night mode is a post-processing trick that stacks multiple frames, extends exposure time, and applies AI noise reduction. It buys you maybe 2–3 extra seconds of hand-hold-ability, but it doesn’t fix the core problem—your hands move, your phone jiggles, and stars blur. I’ve watched people waste an entire dark-sky weekend holding their phones as still as possible, getting blurry constellations, when a $50 tripod would have delivered sharp, clean images. That’s the premise of this guide: the right accessories don’t replace your phone’s camera; they unlock what it can actually do.
The core trio for night sky photography: a sturdy tripod with a phone clamp, a wireless remote shutter release, and either a telephoto lens adapter (for deep-sky detail) or a wide-angle add-on (for landscape). Start there; skip gimmicks.
Why Stargazing Demands Different Accessories Than Everyday Phone Photography
Stargazing is the hard mode of phone photography. Unlike daylight shots where your phone’s sensor has plenty of light and can use fast shutter speeds (1/500th of a second or faster), night sky work forces you into slow exposures—often 2 to 15 seconds—to gather enough light for faint stars to register. At those speeds, even tiny vibration becomes visible blur.
A standard phone tripod for video or selfies won’t cut it either. Those are designed to hold a phone at arm’s length; they’re lightweight and flexible. Point one at the night sky for a 5-second exposure and wind will cause detectable sway. You need mass and rigidity. The other complication: your phone’s lens is fixed. You can’t zoom optically without an adapter, and zooming digitally (cropping pixels) doesn’t gather more light—it just makes the graininess more obvious.
That’s where accessories come in. A tripod locks your phone still. A remote release eliminates finger-jiggle. A telephoto adapter lets you zoom optically (not digitally), pulling in distant star clusters. A wide-angle lens gives you a broader field of view to capture landscape and sky together. None of these are optional nice-to-haves; they’re the framework that makes astrophotography feasible.
The Stabilization Foundation: Why Tripod Quality Actually Matters
Let’s be direct: a flimsy tripod ruins everything downstream. If your tripod sways or bounces, your 10-second exposure captures star trails instead of points. If the head loosens mid-shot, your carefully aimed composition drifts. If the clamp flexes, your phone tilts slightly during the exposure. Any of these ruins the image.
For stargazing, look for these specifics:
- Weight and material: Aluminum legs (not plastic hinges) and a weight of at least 2 lbs when extended. Heavier is more stable; lighter is easier to carry to a dark site. The sweet spot is 3–5 lbs for a full-height setup.
- Leg locks: Flip-locks (lever-based) are faster and more secure than screw-locks. Screw-locks loosen slightly with vibration over a long exposure.
- Ball head or pan-tilt: A ball head (one knob that unlocks all three axes) is easier to aim at the sky and level. A pan-tilt head (separate horizontal and vertical knobs) is slower but allows finer adjustment.
- Phone clamp: The included clamp should grip firmly without rocking. Some tripods have cheap plastic clamps that flex; upgrade to an all-metal clamp if needed. The clamp should also allow portrait or landscape orientation without rebalancing the tripod.
- Level indicator: A small bubble level on the head helps you frame the horizon straight—crucial for landscape astrophotography.
Budget tripods ($20–$35) often skip the bubble level, have plastic leg locks, and wobble in wind. Mid-range tripods ($50–$90) add aluminum construction, metal locks, and a better clamp. You don’t need a $200 pro video tripod for phone stargazing, but $50–$80 is the realistic minimum for genuinely stable night sky work.
When you arrive at a dark site and set up your tripod, gently press down on the phone from above with one finger. If the phone or head flexes noticeably, your tripod isn’t rigid enough. A good tripod feels solid and immovable.
Remote Shutter Release: The Underrated Game-Changer
Even a stable tripod doesn’t protect you from yourself. When you reach out and press the phone’s screen to take a photo, your finger introduces vibration into the whole system. It’s not huge, but for a 5-second or 10-second exposure, it’s enough to soften star focus and create trailing. A wireless or wired remote trigger eliminates that entirely—you press a button on the remote, which is in your pocket or sitting on the ground away from the tripod, and the phone shutter fires without mechanical contact.
There are two main types:
| Type | How It Works | Best For |
|---|---|---|
| Wireless (Bluetooth) | Connects via Bluetooth to your phone’s camera app. No cable. | Flexibility, ease of use. Effective range 30+ feet. |
| Wired (3.5mm jack) | Connects via headphone jack (if your phone has one) or USB-C adapter. Mechanical. | Older phones. No battery in the remote. |
| IR (infrared) | Uses infrared like a TV remote. Works with Android phones that have an IR blaster. | Specific Android models (not all phones have IR blasters). |
For most people doing stargazing on modern iPhones or newer Android phones, a Bluetooth remote is the easiest path. They cost $15–$30, pair once with your phone, and work reliably. The key detail: avoid cheap knockoffs that pair inconsistently or drop the connection. Read reviews to ensure the Bluetooth link is stable. A remote that disconnects mid-shoot is worse than no remote.
An alternative many people overlook: use your phone’s native timer or interval-shooting mode (available in iOS and Android stock cameras, and in most third-party camera apps). Set a 3-second or 10-second delay, press the screen, then step away. The delay lets vibration settle before the shutter fires. It’s not as good as a remote, but it’s free and better than nothing.
Lens Adapters: Telephoto vs. Wide-Angle for Night Sky Work
This is where the real debate lives. Your phone’s default lens (usually 28mm equivalent focal length) is a compromise. It’s wide enough to see the Milky Way across a large patch of sky, but it’s not so wide that faint stars wash out, and it’s not zoomed enough to pull in star cluster detail or the Moon’s craters.
External lens adapters—either telephoto (zoom in) or ultra-wide (zoom out)—let you escape that compromise. Here’s the real-world tradeoff:
Telephoto Adapters (2x, 3x, or higher magnification)
Telephoto lenses optically magnify your view, bringing distant stars closer. A 2x telephoto makes a distant star cluster visible as individual stars; a 3x makes the Galactic core more detailed. The real benefit: telephoto gathering. A good external telephoto lens has a larger optical aperture than your phone’s default lens, which means it gathers more light per unit of sky. That results in brighter, cleaner images of faint objects.
Trade-off: Narrower field of view. You’re seeing a smaller patch of sky, which means framing is trickier, and you can’t capture wide landscape-plus-stars compositions. Also, a heavier telephoto adapter on a tripod magnifies vibration—any tiny sway becomes a noticeable drift. You need a rock-solid tripod.
Wide-Angle Adapters (0.4x to 0.6x, ultra-wide)
These are the opposite: they expand your field of view, letting you capture a massive arc of sky plus foreground landscape. A 0.5x ultra-wide can capture an entire mountainside silhouette with the Milky Way stretched across the sky above it. That’s a classic “landscape astrophotography” shot.
Trade-off: Wide-angle lenses are usually slower (smaller aperture) and don’t gather as much light as a good telephoto. Individual stars appear smaller and dimmer. However, they’re more forgiving: a wider field means small tracking errors or vibration are less noticeable, and framing is easier because you’re seeing a huge chunk of sky.
For your first purchase, consider your actual goal. Are you trying to photograph the Milky Way core, star clusters, and deep-sky objects? Telephoto. Are you trying to capture a scenic landscape with stars? Wide-angle. Many serious stargazers buy both over time.
Avoid ultra-cheap telephoto adapters (under $20). They often have optical quality so poor that you gain zoom but lose sharpness and get internal reflections (lens flare). A decent external lens costs $40–$100. It’s frustrating to go cheap here and then waste a night with blurry, hazy images.
Optical Filters and Coatings: What Actually Helps (and What Doesn’t)
Optical filters for stargazing are a minefield of marketing nonsense. Let me clear up the confusion:
- ND (Neutral Density) filters: These reduce light equally across all wavelengths. They’re for bright daylight or deliberate long exposures in daylight. At night, light is already scarce—using an ND filter cuts it further. Skip them for stargazing.
- Polarizing filters: These reduce glare and reflections from water or shiny surfaces. Useful for landscape astrophotography (e.g., stars reflected in a lake), but not essential.
- Anti-reflective coatings: If you’re using an external lens adapter, coatings that reduce internal reflections and glare can marginally improve contrast and reduce lens flare. This is subtle but real. Quality matters.
- Light pollution filters: Some filters claim to cut out light from sodium vapor or LED street lights while preserving star light. They do have an effect, but it’s not dramatic. If you have bad light pollution, driving to a darker site is more effective than a filter.
Bottom line on filters: they’re not essential for your first setup. Once you have a tripod, remote, and a good lens adapter, then consider a light pollution filter if you’re shooting in a moderately light-polluted area.
Building Your Astrophotography Kit: A Stepped Approach
You don’t need everything at once. Here’s a realistic progression based on budget and ambition:
Phase 1: Foundation ($80–$120)
- Sturdy tripod with phone clamp ($50–$80) – This is non-negotiable. Pick a mid-range aluminum tripod, not a budget plastic one.
- Wireless Bluetooth remote shutter release ($15–$25) – Eliminates vibration from pressing the screen.
At this stage, you’ll take sharp, stable photos of the Milky Way, constellations, and the Moon using your phone’s built-in lens. Your phone’s night mode will handle exposure and noise reduction. This is the setup that solves 70% of beginner astrophotography problems.
Phase 2: First Lens Adapter ($40–$100)
Once you’ve mastered tripod use and understand what you want to shoot, add one external lens:
- If you want detail in star clusters or the Moon: a telephoto adapter (2x to 3x magnification).
- If you want sweeping landscape plus sky: an ultra-wide adapter (0.4x to 0.6x).
Buy from a reputable brand with good optical reviews, not a $15 knockoff. A $70–$80 quality telephoto is worth the difference.
Phase 3: Extras ($30–$80)
Once you’re getting sharp images, consider:
- A second lens adapter (the opposite type from Phase 2).
- A light pollution filter if you’re in an area with significant sky glow.
- A lens cleaning kit (no lint cloths; microfiber only).
- A ball head replacement for your tripod if the original is wobbly.
Don’t buy all of Phase 3 at once. Use Phase 1 and 2 for a few weeks, identify what’s actually limiting your shots, and then upgrade accordingly.
Related Accessories Worth Knowing About
A few other items come up in stargazing forums and deserve clarification:
Smartphone gimbals or motorized mounts: These are three-axis stabilizers that actively level and track the night sky, reducing star trailing. They’re expensive ($200+) and overkill for most phone astrophotography. A good tripod and remote eliminate 90% of the problem for a fraction of the cost.
External phone cooling cases: Some claim that cooling your phone’s sensor improves night photos by reducing thermal noise. The science is real—cooler sensors are less noisy—but a typical phone astrophotography session is 10–20 minutes, not long enough for the phone to heat up significantly. Skip this unless you’re doing extended nightlong exposures.
Star-tracking mounts: These are mechanical mounts that rotate to follow the stars as the Earth rotates, preventing star trailing in long exposures. They’re specialist gear for serious astrophotography and incompatible with phone mounts. Not relevant here.
The core accessories—tripod, remote, and a lens adapter—do the heavy lifting. Everything else is refinement or overkill.
Who This Gear Is For (and Who It Isn’t)
This gear is for you if:
- You want to photograph the night sky with your phone instead of carrying a camera.
- You’ve tried handheld night mode and gotten blurry results.
- You’re traveling or hiking and want lightweight astrophotography gear.
- You want to explore astrophotography without investing in a dedicated camera.
- You’re interested in star clusters, the Milky Way core, or the Moon’s details.
This gear is NOT for you if:
- You’re doing serious deep-sky astrophotography (nebulae, galaxies) and expect DSLR or telescope-quality results. Phone sensors have hard limits; a dedicated camera is necessary.
- You want to shoot time-lapses of star trails over hours. Phone batteries die, and night mode processing is slow.
- You’re in a region with extreme light pollution and expect city-center photos of the Milky Way. Accessories don’t fix the physics of light-polluted skies; go to a dark site.
- You’re unwilling to learn manual camera settings. Astrophotography requires tweaking ISO, shutter speed, and focus; point-and-shoot defaults won’t work well.
Night sky photography with a phone isn’t magic—it’s mechanics. A stable tripod, a wireless remote, and a quality lens adapter are the three accessories that matter. Start with a solid tripod (the foundation), add a remote (the vibration killer), then pick a lens based on what you actually want to shoot. You don’t need $500 of gear; you need $100–$150 of the right gear. Once you’ve done that, the limiting factor shifts from equipment to location and technique, which is where it should be.
One More Thing: Practice and Dark Skies Beat Gear
Here’s the harsh truth: the best phone astrophotography accessory is a drive to a dark site far from city lights. A $150 kit in a Bortle 1 or 2 dark sky (meaning minimal light pollution) will outperform a $500 kit in the city. Light pollution is the enemy, and no filter or lens fixes it.
Apps like Dark Sky Finder show you light-pollution maps. Most people with decent skies are 30–60 minutes from a city. Go there. Once you’re at a dark site, your tripod, remote, and lens adapter will produce images that rival entry-level DSLR astrophotography.
Learn how to use manual mode in your camera app. Understand ISO (sensor sensitivity), shutter speed (exposure duration), and white balance. Practice focusing on a star (live focus with the magnified preview, not autofocus). These skills matter more than any single accessory. The gear enables it, but the skill executes it.
Also check out our guides on phone accessories to extend battery life and smartphone accessories for 2025 for complementary gear that helps during long nights outdoors—extra battery capacity and durable cases are useful when you’re in remote dark-sky locations.
Disclosure: This article contains affiliate links. As an Amazon Associate I earn from qualifying purchases. We may earn a commission at no extra cost to you from qualifying purchases made through affiliate links. All recommendations are based on genuine product assessment and buyer need, not affiliate commission.